The mentioned functionalities may be restricted depending on the purchased software license.
Gestão do Controlador de Exibição Público
O controlador de exibição público é o dispositivo de hardware físico que exibe suas visualizações personalizadas. Este guia abrangente cobre tudo que você precisa saber sobre a gestão do controlador, desde a reivindicação inicial até as opções de configuração avançadas.
📋 Visão Geral
O que é um Controlador de Exibição Público?
O controlador de exibição público é um dispositivo de exibição dedicado que:
- 🖥️ Renderiza visualizações personalizadas (Exibições públicas) criadas no SmartgridX
- 📱 Suporta vários tamanhos de tela com layouts responsivos
- 🔧 Requer reivindicação para vincular à sua conta SmartgridX
Principais Recursos
| Recurso | Descrição |
|---|---|
| 🎨 Exibições Personalizadas | Mostra exibições públicas personalizadas com base em seus modelos |
| 📊 Dados em Tempo Real | Exibe dados e métricas de instalação ao vivo |
| 📐 Design Responsivo | Adapta-se automaticamente a diferentes tamanhos de tela |
| 🔒 Acesso Seguro | Requer códigos de verificação para vinculação de conta |
| ⚙️ Gestão Remota | Configure e atualize exibições a partir do portal web do SmartgridX |
🚀 Começando
Pré-requisitos
Antes de começar, verifique se você tem:
- ✅ Dispositivo controlador físico com fonte de alimentação, ethernet e uma conexão hdmi com um display
- ✅ Conta SmartgridX com permissões adequadas
- ✅ Credenciais do controlador (número de série e código de verificação do adesivo do dispositivo)
Informações de Segurança Importantes
🔐 Proteja suas Credenciais: O número de série e o código de verificação impressos no adesivo do seu controlador são permanentes e irrecuperáveis.
Melhores Práticas:
- 📝 Documente imediatamente - Registre as credenciais em um arquivo seguro ao receber o dispositivo
- 🚫 Limitações de suporte - Nossa equipe de suporte não pode fornecer códigos de verificação por razões de segurança
- 📷 Backup fotográfico - Considere tirar uma foto clara do adesivo como backup adicional
🎛️ Interface de Gestão do Controlador
Acessando a Seção do Controlador

Passos de navegação:
- Faça login na sua conta SmartgridX
- Navegue até 'Exibições públicas' na barra lateral principal
- Clique no botão 'Ir para a visão geral do controlador de exibição pública' na página de visão geral
Isso abre a tabela de visão geral do controlador onde você pode visualizar, reivindicar e gerenciar todos os seus dispositivos.
Tabela de Visão Geral do Controlador

A tabela do controlador fornece:
| Coluna | Informação |
|---|---|
| 📟 Nome do Dispositivo | Nome personalizado para fácil identificação |
| 🔢 Número de Série | Identificador exclusivo do dispositivo |
| ⚙️ Ações | Opções de editar ou desvincular |
Elementos da interface:
- ➕ Reivindicar Controlador de Exibição Pública - Botão verde (no canto superior direito) para adicionar novos dispositivos
- �📅 Tabela - Exibe todos os controladores reivindicados com seus detalhes
🔗 Reivindicando Seu Controlador
Processo de Reivindicação Passo a Passo
1. Iniciar Reivindicação
Clique no botão verde "Reivindicar Controlador de Exibição Pública" para iniciar o processo de registro.
2. Insira as Credenciais do Controlador
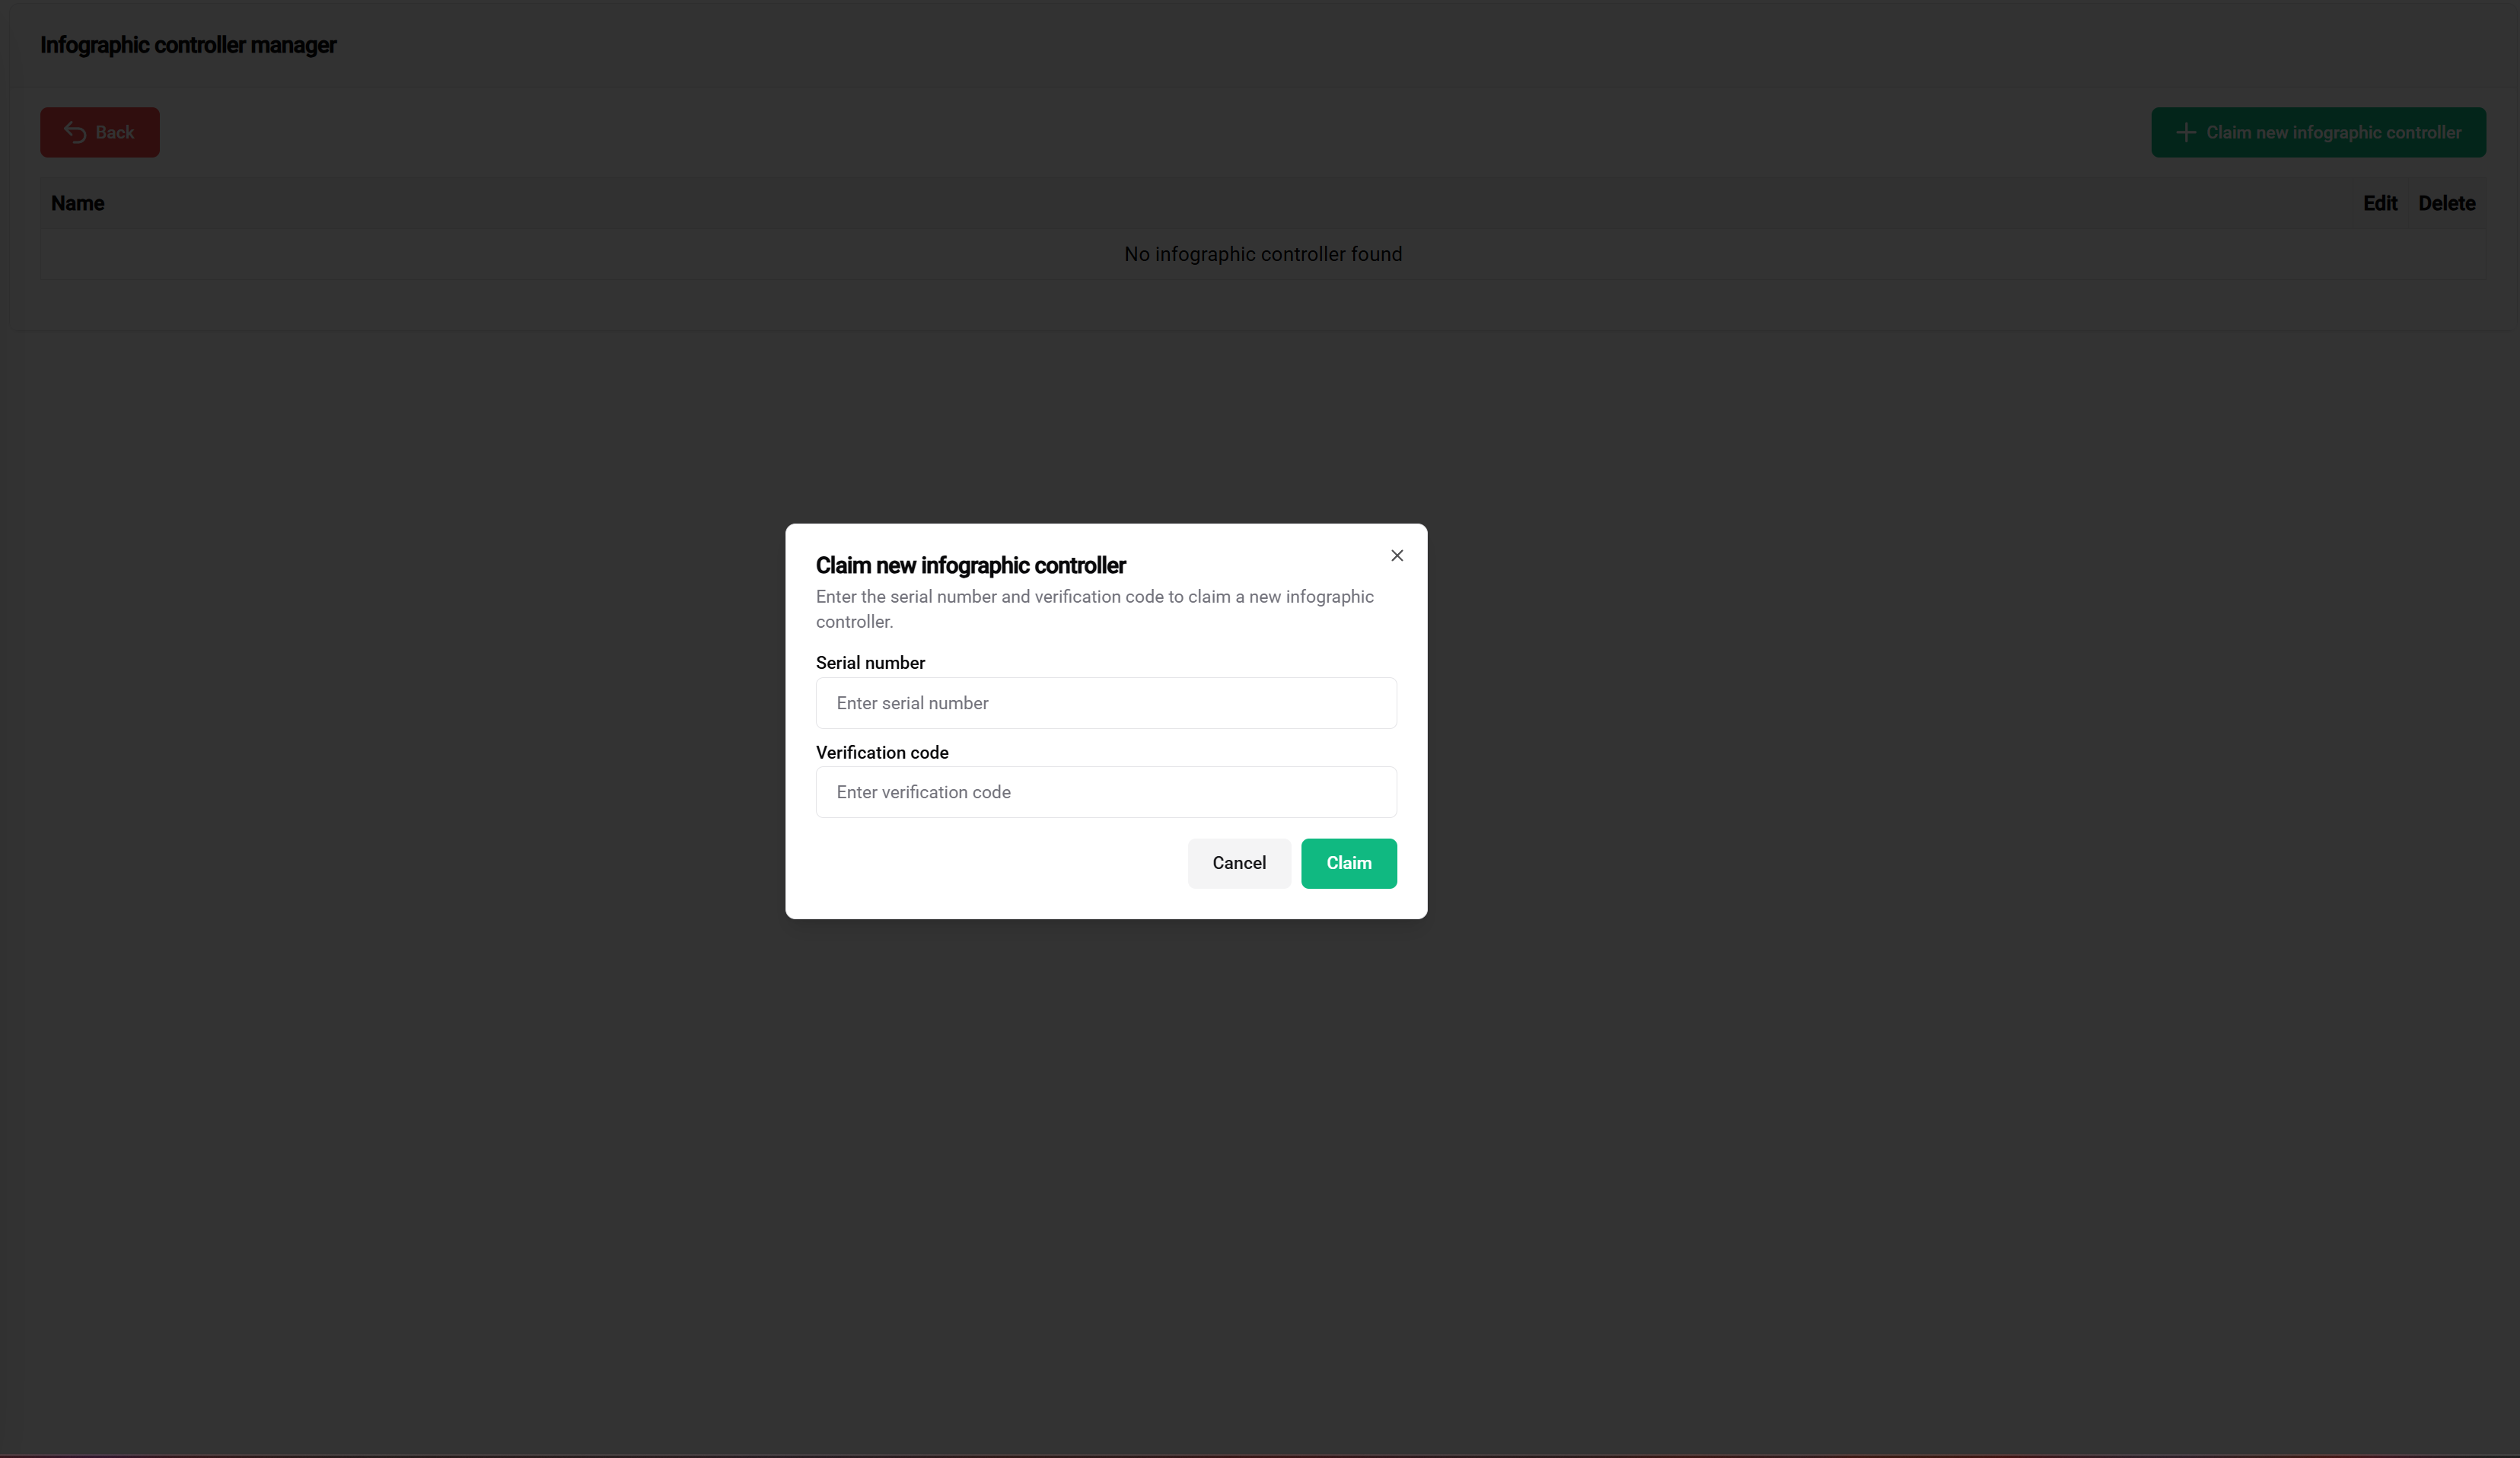
Informações necessárias:
- 📟 Número de Série
- 🔐 Código de Verificação
Localização: Impresso no adesivo do dispositivo controlador
Formato: Código alfanumérico (varia conforme o modelo)
Finalidade: Identificação exclusiva do dispositivo
Dicas:
- ✅ Verifique a precisão
- ✅ Verifique várias vezes contra o adesivo do dispositivo
Localização: Impresso no adesivo do dispositivo controlador
Formato: Código de segurança (varia conforme o modelo)
Finalidade: Impede a reivindicação não autorizada do dispositivo
Notas importantes:
- 📝 Documente antes de usar - Salve em local seguro
- 🔒 Não compartilhe com pessoal não autorizado
- ⚠️ O suporte não pode recuperar códigos perdidos - Mantenha as credenciais seguras e acessíveis
3. Enviar e Verificar
Após inserir ambas as credenciais:
- Verifique a precisão de ambos os campos
- Clique em "Reivindicar Controlador" para enviar
- Aguarde a verificação - O sistema valida as credenciais com o banco de dados do dispositivo
Resultados da Reivindicação

✅ Reivindicação Bem-sucedida:
- O controlador aparece na sua tabela de gestão
- Nome padrão atribuído (geralmente baseado no número de série)
- Status mostra como "Reivindicado" ou "Pronto para Configuração"
- Disponível para atribuição de template e configuração
❌ Problemas Comuns de Reivindicação:
| Erro | Causa | Solução |
|---|---|---|
| Número de Série Inválido | Erro de digitação ou formato incorreto | Verifique contra o adesivo do dispositivo |
| Código de Verificação Inválido | Entrada de código incorreta | Verifique o adesivo, assegure-se de que corresponde exatamente |
| Já Reivindicado | Dispositivo registrado em outra conta | Contate o suporte se for legítimo |
| Dispositivo Não Encontrado | Número de série não está no sistema | Verifique a autenticidade do dispositivo |
⚙️ Configuração do Controlador
Configurações Básicas do Controlador
Uma vez reivindicado, você pode configurar várias configurações do controlador:
Nomeação do Dispositivo
Propósito: Crie nomes significativos para fácil identificação em implantações grandes
Melhores práticas:
- 🏢 Baseado em localização: "Edifício-A-Lobby", "Fábrica-Andar-2"
- 🎯 Baseado em função: "Painel-Principal", "Exibição-KPI"
- 📅 Baseado em projeto: "Monitor-Projeto-Alfa"
Configuração da Rede
Requisitos de conexão:
- 🌐 Acesso à Internet (apenas Ethernet) para sincronização de dados
- 🔒 Lista de permissão de firewall para os domínios do SmartgridX
- 📡 Conexão estável para atualizações em tempo real
Opções Avançadas de Gestão
Ações do Controlador
| Ação | Propósito | Quando Usar |
|---|---|---|
| ✏️ Editar Nome | Atualizar a identificação do controlador | Reorganização, realocação |
| 🔗 Vincular Configuração | Atribuir templates de exibição pública | Configuração inicial, alterações de template |
| 🔓 Desvincular | Remover da conta | Desativação, transferência |
📚 Documentação Relacionada
Próximos Passos
Após reivindicar com sucesso seu controlador:
- 📐 Criar Templates - Projete seus layouts visuais
- ⚙️ Configurar Templates - Aplique templates às instalações
- 🚀 Guia de Introdução - Complete o guia de configuração
🎯 Pronto para Implantar? Com seu controlador devidamente reivindicado e configurado, você está pronto para criar impressionantes exibições públicas para suas instalações SmartgridX!